One of the coolest chairs I've caned

One of the coolest chairs I've caned

Monday, March 10, 2014

Something New

My customer handed me this little stool. "Just put a seat in it. I trust your choice." she said.
It was very loose, so I re-glued it.
Then I decided to try something new. I wrapped it with brown flat fiber and wove it with white flat fiber in a pattern of 2s.
I wasn't sure at first but the more I look at it the more I like it.
When my customer came to pick it up she liked it so much she gave me another to do exactly the same.
I think I'll start weaving more stools in the combination of colors. A diamond pattern would really stand out.

Monday, February 10, 2014

How to Insert a Pressed Cane Seat

Before!
Here is a chair I prepped for new cane. I cut out the old cane and spline. I'll demonstrate that another time. Here you see the cane with the materials I ordered from H. H. Perkins company. One sheet of cane slightly larger than the area to be caned and a length of spline the right size for the groove. The Perkins employees are very good at determining the materials needed for a chair. Just have the chair and a tape measure handy when you phone in your order. After you get more experience and know what you need you can order online.
These are the tools I use for pressed cane work. 
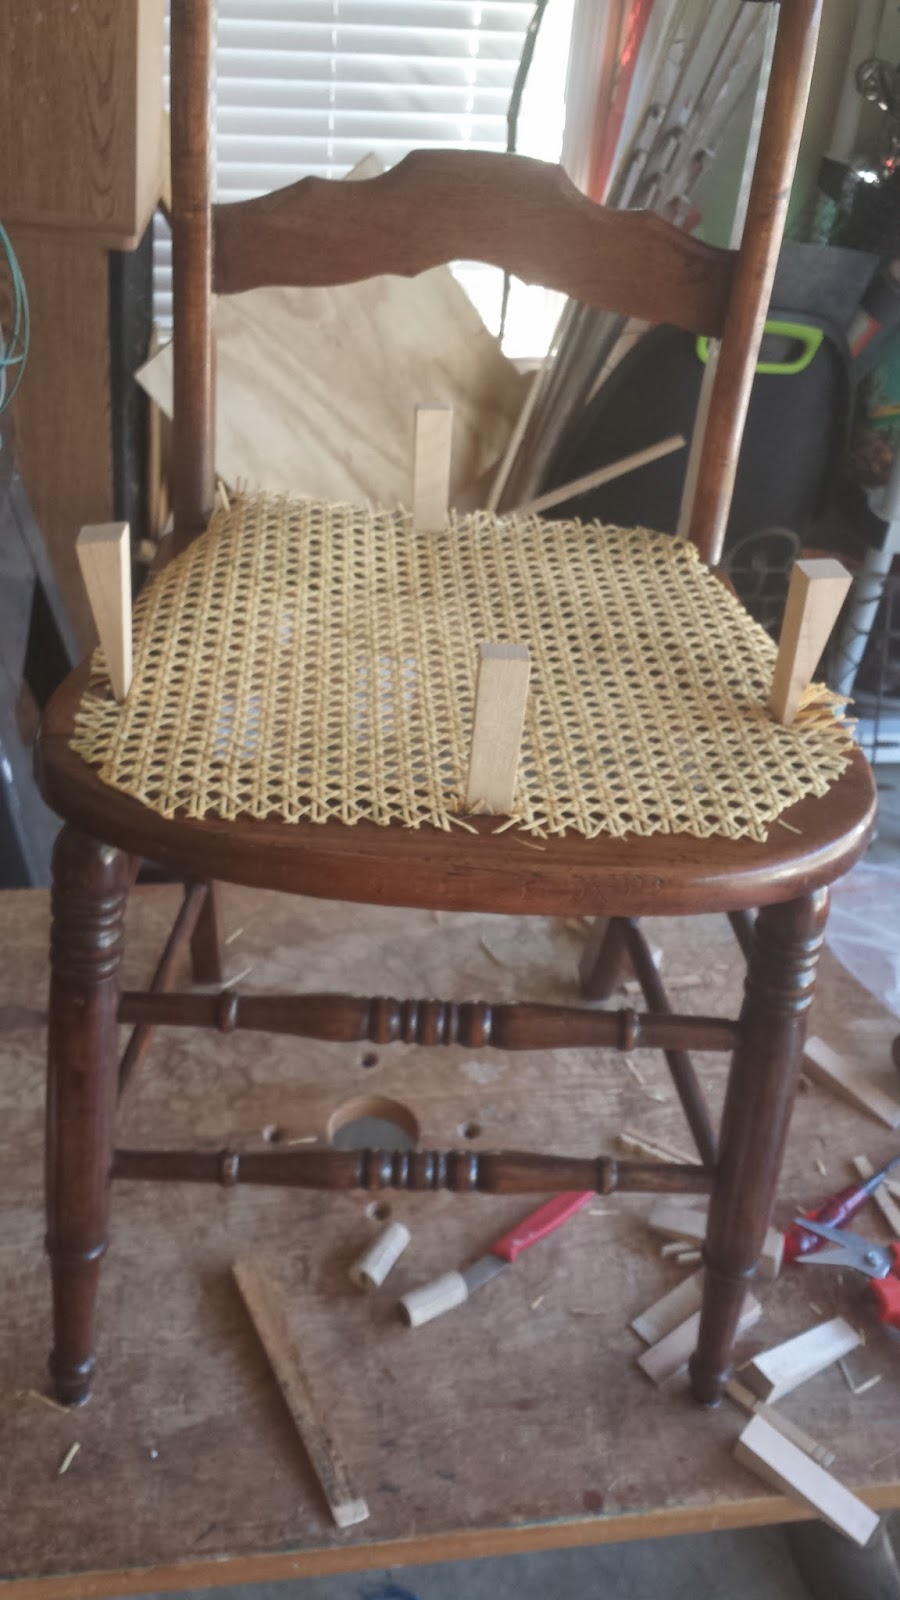
Wedges can be bought from a caning supplier or if you know someone with a band saw you can get them made. Failing that, disassembling clothes pins makes for perfectly adequate wedges. See the shim on the right hand side? You can buy a pack and shorten them but they tend to be too narrow and you have to use several to lock the cane in place.
An old mallet is used to tap the wedges into the groove A hammer will do but your wedges will last longer with the mallet which can be made from a piece of 2X4 and a piece of old broom handle. It doesn't have to be pretty!
 A knife, (the sharper the better) and a chisel are used for trimming the cane and cutting the spline.
My soaking units are a large bucket and a piece of capped PVC pipe screwed down to a piece of plywood. If you are doing just one chair the bucket will suffice. No need to buy all the stuff I use if it's a small job, and you're not going to do it all the time.
 Be sure to use hot water as the cane will soften faster. I do a lot of these chairs and the advantage of the pipe is...
I just drop the cane in the water, I don't use as much water and if the cane is bigger that the bucket I don't have to fold it to get it under water.
You can push in a short piece of leftover spline to keep the roll from surfacing.
Soak it until the cane is soft but not long enough to darken. 15 to 30 minutes should be enough.
 The spline needs to soak only about a minute. We don't want it to swell. If that were the case it would shrink when it dried. Not what we want at all.
 The cane has soaked enough the be flexible and not brittle. Note the string on the front of the cane? Pull it out and the 2 strands behind it.
 Turn the sheet 180 degrees so the prepared end is at the back.
Now line it up with the char and peg it at the back. Tap the peg in gently so as not to break the cane. Put the peg where you prepared the cane.
Keeping the sheet aligned, cut the cane around the outside of the seat frame. Use shears or scissors. The better your tools the easier the job will be.
Keeping the sheet aligned, peg at the front. In the picture I cut the cane a bit short. See how I have pulled out strands that are completely outside of the pattern inside the groove.
Now peg the sides, still making sure the sheet of cane is even with the seat frame. I use the front glue joint that joins the seat front to the two side pieces as my reference point keeping the same pair of horizontal strands even with it. Now, using another peg and the mallet gently tap the cane in all around.
Now we can trim out the excess cane. We can remove the wedges at this point.
Carefully using a sharp knife and/or a sharp chisel cut off any protruding strands of cane.
 I use an old paring knife that I accidentally broke the tip off of. Serendipity! It has the advantage of having a flat tip that I can use to push the cane back into the groove if it pulls up while I am cutting it. That happens often. I give mine a few licks on a sharpening stone just before starting to cut. Sometimes the knife can't reach a strand. That's when the chisel comes into its own.
Keep cutting until it's all done. Don't use more force than necessary. We want to keep our fingers whole!
Carefully run a bead of glue along the whole groove. Do not fill the groove with glue. Leave room for the spline. You can take a small paintbrush and evenly spread the glue. I usually use several strands of excess cane dragged through the groove to spread it.
Tap the spline into the groove starting at the center of the back. I use a rubber mallet for this so it won't dent the spline. When it's all the way around I mark where I want to cut it with my knife. You can just see the incision.
Next I slide a shim (available in packs at the hardware store and useful for all kinds of things) under the incision to protect the chair and my work. I saw the knife back slightly undercutting the end of the spline.
You can see the slight undercut.
Tap it in the rest of the way. Make sure the spline is at even height all around, and cut off any fine tendrils that might be trailing off the seat. Allow the cane to dry slowly out of the sun.
The cane does not take stain well. The spline soaks it up better than wood.
It's better not to stain the cane. Staining seals, and sealing allows moisture out but not in. Your cane seat will sag after a few months of use, and when that happens you can rub it down with a wet rag, let it dry slowly again and it will tighten back up. Staining removes this property. The cane will darken with age but it will take years.
After!

Thursday, February 6, 2014

Who watches the Pro Bowl?

Not I! Way too  much work to do!
Saturday the 25th I was able to cut out the seats and splines of 6 chairs that my refinisher had supplied me. With my Carpel Tunnel issues I'd put off and put off doing them. Then it was time. The weather was quite cold but cutting out is dry work so I was able to remove the old seats in the garage. I was very lucky as the splines came out quite easily. My specialized chisels pried them out efficiently.

Sunday was cold in the garage. Too cold for wet work. I set up on the back porch which was in sunlight and slightly protected from the wind. Inserting new pressed cane is too messy for inside the house. All the wet little pieces of excess cane trash the place and are hard on a vacuum cleaner. Thankfully my tools did me well and I was able to install all 6 seats that afternoon. Now I just have 6 more to do for the same set, they just don't look the same as these.

Superbowl weekend I was back cutting out seats. This time the weather was good, and thank goodness. These splines did not want to come out. They were very well glued in. I had to drill 1/8" holes in the spline at 2" intervals and use my steamer (See Post "My new best friend!)
Luckily the finish on the chairs was robust and the steam did not affect it, because I had to use a LOT of steam, so I was working wet again.
I got the first 4 done, and though the other 2 were different I had the same issues removing the splines.
Then there was the wicker rocker. I had to use steam to get the old cane off the frame because it had been painted over and also I had no leverage as the back was in the way except for the front of the seat.
Superbowl Sunday arrived and Kimberly had to work that afternoon. I was able to install all the seats. I did the odd little wicker rocking chair first as it had close weave cane in it, and i didn't know how well it would go. It went much better that I had feared.
As you can see there are no holes in the cane and the back surrounds much of the seat.
Then I did the 4 spindlebacks.
And then the two flatbacks.
And thankfully I'm done with the whole order. With the open weave chairs and the pressed cane it's a total of 16 chairs in all.


Maple sway seat chairs

I have had the privilege of working on 5 of these chairs for the friend of a co-worker. They are slightly different to work on because you need to incorporate the curve of the side rails into the weave of the chair. You have to start by laying out the horizontal first, and putting in a vertical row behind it. You then put in another horizontal row behind that and then weave vertically. The diagonal weaves are normal, and as the chair seat is virtually square very easy to figure out. The result is an attractive chair and a satisfied caner!
The 6th chair in the set was a little pressed cane seat. The materials have not yet arrived. I intend to do a step-by-step photo post on how you go about installing a pressed cane seat.

Friday, January 24, 2014

Long Wekend

This weekend I decided that Carpel Tunnel Syndrome wasn't going to stop me from caning. I had 4 days to work as we had MLK Day on Monday and I had taken Friday to wait for repairmen to come work on our heat and our gas fireplace.
Kimberly's hairdresser had given her a couple of chairs for me to do, so it was time to get back to it. The first chair I did was a rush seat, which was what brought on my CTS in the first place. I set up in our bedroom with a space heater as the garage was way too cold to work in that morning.
It turned out pretty well. 
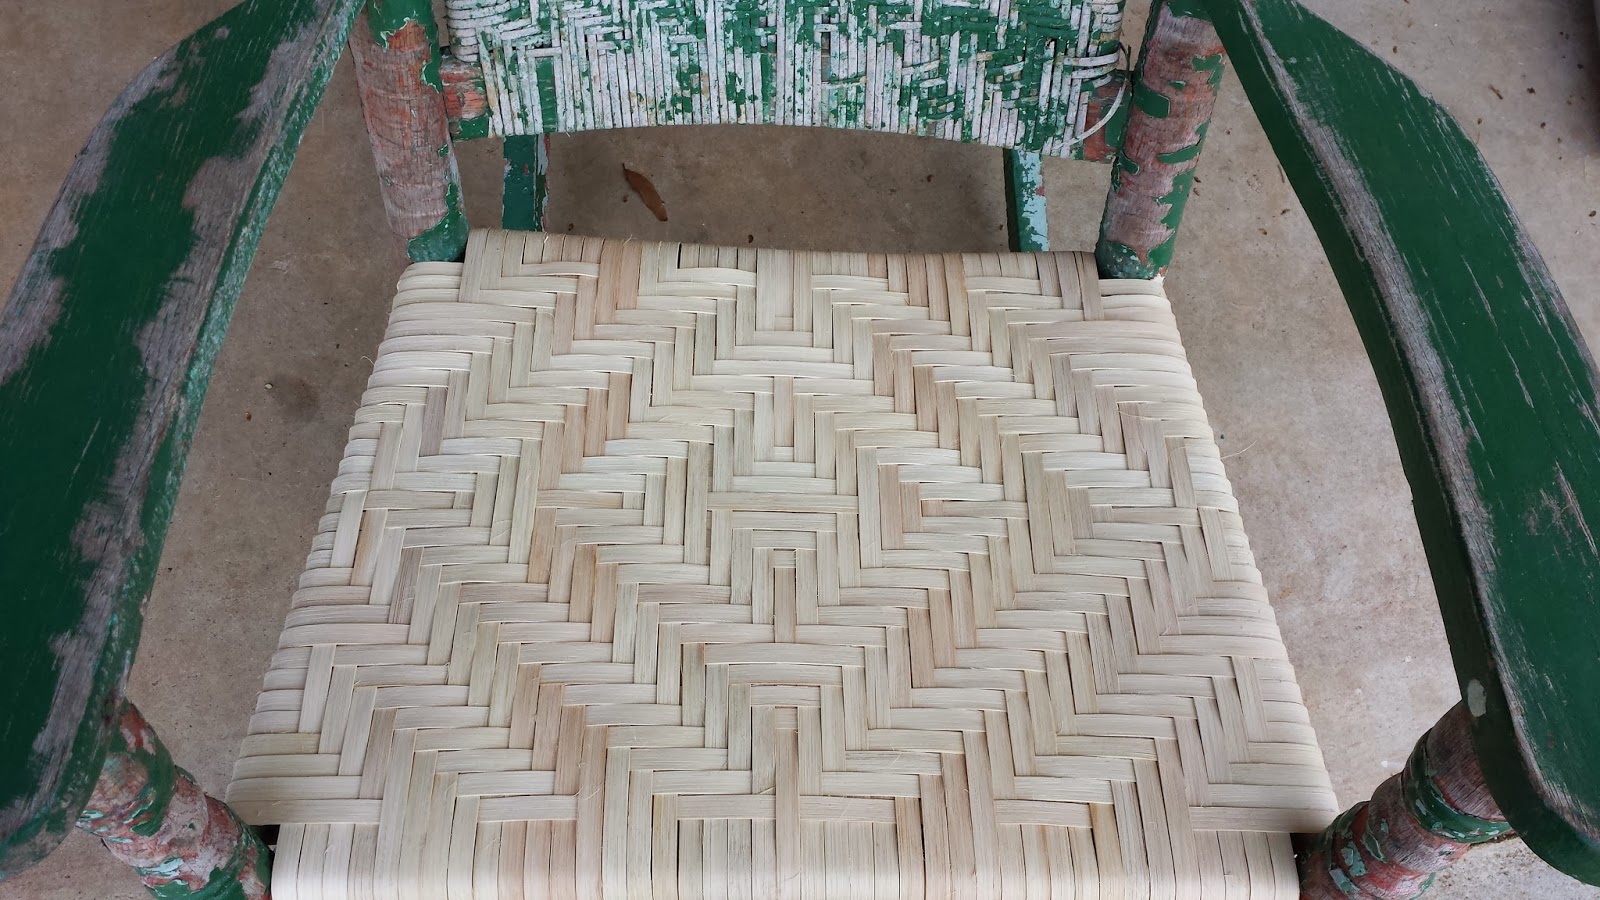
The next chair I worked on was a rocking chair a co-worker had asked me to put a flat reed seat in. It came out to 41 strands in the warp. Odd numbers I like as that means I can do a very effective diamond by dividing the seat into quadrants. This also meant I could do a pattern of 4 which came out very nicely.

Saturday was much warmer. I was able to set up in the den. Our gas fireplace was working by then so it was nice and warm. I soon knocked out a small pressed cane seat.

 Then there was a chair with a pressed cane seat and back. The back was OK, but the seat had to be replaced. I'm not good at matching new cane to old, so I'm waiting for the owner to decide the next step.


I had run out of work in my garage, so I had to run to my storage to pick up some more. I got 6 pressed cane seats and two open weave, plus a porch rocker in rush. That should keep me busy for a while. 
When I got them back home I cut out one of the open work ones and started on it. It was a square seat with 56 holes in medium 3.0 mm cane. 


I didn't manage to finish it Saturday night, but early Sunday it was done and I started on the other. It was a round seat in fine 2.5 mm cane with 76 holes. It was not well drilled and I should have used one grade finer cane on it as the strands ended up being slightly too close together. Added to that the fact that the cane wasn't the highest quality and it tended to break while being woven... 
I worked on it Sunday until I got frustrated with it. Then I cut out the 6 pressed cane seats (they came out fairly easily) before the Conference football games started. Then it was time to watch some football! What a shame my Atlanta Falcons weren't in it this year.

I worked on that darn seat most of  MLK day and finished it after work on Tuesday night. 
Way too long! Hopefully the pressed cane will cooperate.

Tuesday, November 5, 2013

A Productive Weekend


I managed to rush both ladderbacks above and weave splints on the little stool on Saturday. I was also able to pull the cane and spline on one side of the back of a high backed dining room chair. Sunday morning was warm enough for me to put in cane and spline in the dining room chair. Now I have to match the stain of the remaining cane. I forgot to take pics of the high back. The owner has is. I must have put 5 coats of Antique Walnut Polyshade on it but it still wouldn't darken up to match. Grrr! At least the customer liked it.

Sunday, October 20, 2013

It's Done!

Finally the biggest job I've taken on since the school closed the caning shop is finished. It consisted of 3 rush ladderbacks and 8 rocking chairs.
First the ladderbacks. The best thing I can say about them is that they are finished. They were ugly, so no pictures. The front of the seat was 18 inches and the back rung was 14 inches, nearly a 1/3 difference so the slope on the side rungs was horrible and the material wanted to slide to the back.
The good part of the job was the rocking chairs. There were 3 with just seats and Kimberly did all 3. One was woven into the seat (See the post "New Partner") and the other 2 were frames that had to be caned and then screwed into the chair frame. Luckily I was able to repair both frames and didn't have to make new ones from scratch as I usually do.
This rocker was different from all the others. I liked the design so I caned the seat and the back on this one.
Then there were the 4 Brumby rockers. These are made by the Brumby company from Atlanta. They epitomize the Southern Porch Rocker. Rosalyn Carter installed several on a porch in the White House during her husband's administration. The company made wagons for the Confederate Army during the War Between the States. When the war ended they had no customers for their wagons so they started making rocking chairs and they became a Southern icon.
Kim caned some of the seats and I caned all the backs. Though I say it myself the chairs look very good. After they are finished by the furniture refinisher who contracted with me to do them they will be beautiful!

*********
I went by the refinisher's shop to drop off some more chairs and the rockers were still there.


I love them!